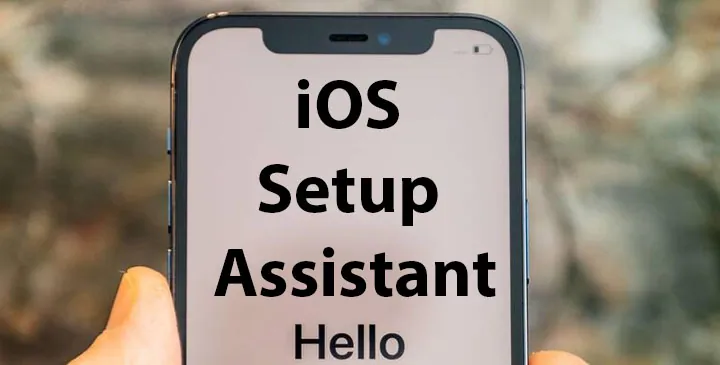
Apple’s iOS Setup Assistant is a crucial feature that users encounter when setting up their new iPhones, iPads, or iPod Touch devices for the first time or after a factory reset. The Setup Assistant serves as a guided tour, helping users configure their devices with essential settings and personal preferences. In this blog post, we will delve into the various aspects of the iOS Setup Assistant, exploring its functionalities, customization options, and the essential steps you should take during the setup process.
Navigating the iOS Setup Assistant’s Intuitive Interface
1. Prepare Before Unboxing
Before you start the setup process, take a few moments to prepare. Ensure you have a stable internet connection and a fully charged device. Having a recent backup of your old iOS device on iCloud or iTunes will allow you to restore your data easily during the setup.
2. Customize Language and Region Settings
When you power on your new iOS device or perform a factory reset, the Setup Assistant automatically initiates. The first step involves selecting the device’s language, country, and region. This choice determines the default language used across the device and relevant region-specific settings such as date and time formats, calendars, and more.
3. Connect to Wi-Fi or Cellular Network
To proceed further, you will need to connect to a Wi-Fi network or use cellular data. Internet connectivity is essential during the setup process as it allows the device to activate with Apple’s servers and download the latest iOS version and security updates.
4. Set Up Touch ID or Face ID (Biometric Authentication)
For devices with Touch ID (fingerprint recognition) or Face ID (facial recognition), the Setup Assistant prompts you to set up this biometric authentication feature. This ensures enhanced security for unlocking your device, making app purchases, and accessing sensitive information.
5. Apple ID Sign-In
An Apple ID is a crucial component of the iOS ecosystem, linking your device to your Apple services, iCloud storage, and App Store purchases. If you already have an Apple ID, you can sign in during the setup process. If not, the Setup Assistant provides an option to create a new Apple ID.
6. Restore from iCloud or iTunes Backup (Optional)
During the setup, you have the choice to restore your device from an iCloud or iTunes backup. This feature lets you transfer your previous device’s data, settings, and apps to the new device, saving you time and effort in reconfiguring everything manually.
7. Enable Location Services
The Setup Assistant will ask for your permission to enable Location Services. These services are used by various apps and system features to provide location-based functionalities like maps, weather updates, and location tagging in photos.
8. Siri Setup
Siri, Apple’s virtual assistant, can be customized during the setup process. You can choose to enable or disable Siri’s voice-activated functionality and train Siri to recognize your voice for better accuracy.
9. App Analytics and Diagnostics
Apple offers an option to share app usage data and diagnostics with the company. While this data helps Apple improve its products and services, you have the freedom to opt out if you prioritize privacy.
10. Apple Pay and Wallet (If Supported)
For devices equipped with NFC (Near Field Communication) capabilities, the Setup Assistant provides the option to set up Apple Pay, allowing you to make secure payments using your device.
11. Screen Time and Parental Controls
As a part of Apple’s commitment to digital well-being, you can configure Screen Time during the setup. Parents can set up parental controls to manage their child’s device usage, including app limits, content restrictions, and more.
Final Words of iOS Setup Assistant
The iOS Setup Assistant streamlines the process of setting up your new Apple device, ensuring a smooth and personalized experience from the start. From language selection to biometric authentication, Apple ID integration to Siri setup, and beyond, the Setup Assistant allows users to customize their devices to suit their preferences while ensuring security and privacy.
Next time you unbox a new iOS device or perform a factory reset, rest assured that the iOS Setup Assistant is there to guide you through the process, making sure you get the most out of your Apple device right from the very beginning. Happy setup!
Frequently Asked Questions (FAQs) – Optimizing Your iOS Setup Assistant Experience
1. What is the iOS Setup Assistant?
Ans: The iOS Setup Assistant is a guided tour that appears when you set up a new iPhone, iPad, or iPod Touch for the first time or after a factory reset. It helps you configure your device with essential settings and personal preferences.
2. Can I skip the iOS Setup Assistant?
Ans: No, the iOS Setup Assistant is a crucial part of the initial setup process and cannot be skipped. It ensures that your device is properly configured and ready for use.
3. How do I set up biometric authentication (Touch ID or Face ID) during setup?
Ans: During the setup process, your device will prompt you to set up biometric authentication if it is supported. Simply follow the on-screen instructions to register your fingerprint (Touch ID) or scan your face (Face ID).
4. Can I change my language and region settings after setup?
Ans: Yes, you can change your language and region settings after the initial setup. Go to “Settings” > “General” > “Language & Region” to make adjustments.
5. What happens if I don’t have an Apple ID during setup?
Ans: If you don’t have an Apple ID, you will be given the option to create one during the setup process. An Apple ID is necessary for accessing various Apple services, the App Store, and iCloud.
6. How can I restore data from an iCloud or iTunes backup during setup?
Ans: To restore data from an iCloud or iTunes backup, select the appropriate option during the setup process. Make sure your device is connected to the internet, and follow the on-screen instructions to restore your data.
7. Can I enable Siri after setup?
Ans: Yes, you can enable Siri after the initial setup. Go to “Settings” > “Siri & Search” and toggle on “Listen for ‘Hey Siri'” or “Press Side Button for Siri” to activate Siri’s voice-activated feature.
8. What is iCloud Keychain, and how do I enable it during setup?
Ans: iCloud Keychain securely stores your passwords and payment information across all your Apple devices. To enable it during setup, select the option to set up iCloud Keychain and follow the prompts.
9. How can I manage app usage with Screen Time after setup?
Ans: To manage app usage with Screen Time, go to “Settings” > “Screen Time” and set up app limits, downtime, and app usage reports. You can also enable “Family Sharing” to monitor and manage family members’ device usage.
10. Are there accessibility options available during setup?
Ans: Yes, iOS offers various accessibility features. You can access them during setup by going to “Settings” > “Accessibility” and exploring options such as VoiceOver, Magnifier, and more.
11. Is it essential to review privacy settings during setup?
Ans: Yes, reviewing privacy settings during setup is crucial to safeguard your data and ensure your privacy. Go to “Settings” > “Privacy” to manage app permissions and data access.
12. Can I change the Siri voice and language settings after setup?
Ans: Yes, you can change the Siri voice and language settings at any time. Go to “Settings” > “Siri & Search” > “Siri Voice” to select a different voice. To change the language, go to “Settings” > “Siri & Search” > “Language.”